General
VendorPayout automates vendor payment management for Shopify store owners. Check out our Introduction to VendorPayout article for more information.
Go to your Shopify admin, navigate to Settings > Apps Find the VendorPayout app, click on the three dots, and select Uninstall
Vendors
Yes, vendors can be created directly in VendorPayout on the Create Vendor Accounts page, rather than only through Shopify.
No. After creating a login for a vendor, you will need to reach out to the vendor directly with their credentials. VendorPayout emails may appear as spam to vendors who don't recognize the app.
Yes! You can embed the VendorPayout login page into your Shopify theme so vendors can access their portal without leaving your store.
Vendors must contact the store owner, who can reset passwords through VendorPayout's system.
Check the Deleted Vendors page to restore accidentally deleted vendors, then recreate their login access if needed.
Ask the store owner to open Products or Products & Inventory, then choose More > View deleted products. Check whether the product appears on the Deleted Products page, using the page controls to browse all results. If it is there, click Restore and ask the vendor to refresh their page.
Deleting a product in VendorPayout only hides it from the active product and inventory views; it does not delete it from Shopify. If restoring does not resolve the issue, check product filters, vendor assignments, and vendor login permissions. See Delete (Hide) and Restore Products for the full steps.
Orders
VendorPayout only syncs orders once a day in the morning. You can manually sync orders from the Orders page at any time.
When you first install VendorPayout, only the latest 250 orders are synced. Contact support@vendorpayout.com to sync additional historical orders.
Yes, orders can be customized including payout calculations after syncing.
Payouts & Payments
Open Payouts and click a vendor's This Month's Payout amount. From their payout page you can send a one-time PayPal payout, or create a payout statement and settle it by PayPal or by recording a payment.
A payout statement is an itemized record of the unpaid sales a vendor is being paid for. It calculates the amount due, produces a shareable PDF, and is settled either through PayPal or by recording a manual payment. Once settled, the sales are marked paid and the vendor can view the statement in their portal. See Create a Payout Statement.
It's each vendor's earnings so far in the current month, updating as new sales come in. For statement-led stores it replaces the older Commission Owed / Current Balance figures on the Payouts and Vendors pages.
Yes! You can schedule recurring payouts. On statement-led stores each recurring run creates a draft payout statement that is either auto-approved and paid via PayPal or held for your approval before anything is sent.
You can specify whether payouts calculate on the discounted or full product price. See discount settings for details.
No, VendorPayout calculates on the product price only. However, you can add custom deductions through the Settings page.
Yes! Using split overrides, you can configure payouts by Product Tags, titles, SKUs, and more.
Yes, single products can have payouts distributed to multiple vendors using split overrides.
Yes! Contact support@vendorpayout.com for custom configuration assistance. No two stores are alike, and VendorPayout can be tailored to fit your store's needs.
Create a payout statement for the sales and choose Record a payment to log it. To update many older line items at once, you can also mark them as paid in bulk from Settings.
Yes. In the vendor portal, under Payouts, vendors can open Payout statements to view settled statements (and their PDFs) and Payout history to see every payout recorded for them.
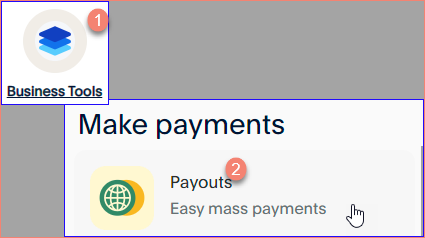
Verify your PayPal Client ID and Secret are correct, and ensure Payouts is properly configured in your PayPal Business Tools.